Prelude and Caveat
This post builds on another post that introduces RESTful APIs using Node-RED. If you haven’t read it already, please see that post.
It should be repeated that there are other – perhaps better – ways besides a RESTful API for connecting a MIDI device to a web application. In a future post I will extend this MIDI example using web sockets, but please note that the central purpose of this discussion is not to demonstrate an ideal solution but rather to demonstrate the value of API prototyping using visual tools.
RESTful MIDI API
If we want to start off with the default node types defined by Node-RED, we can wrap the midi test code from Part I in a bi-directional UDP facade, then sneak the whole thing into Node-RED’s global context. Here is the updated script called “midiforwarder.js”.
Lines 12 and 13 open the MIDI device for input and output. If your device is on a different port you can change that on line 3. Lines 16-19 forward MIDI messages to a UDP port that we can put into our visual workflow. Node-RED’s UDP input supports Buffers, simple strings, or base64 encoded strings. We have chosen to use a buffer since this is nice and compact, and it makes it easy to parse in our workflow. Lines 22-24 will let us define a UDP node that ultimately writes to the MIDI device. You may notice a distinct lack of error checking here. We will be handling that responsibility as our API prototype evolves, but first we’ll focus on basic functionality.
| |
You could just run this as a stand-alone NodeJS script, but if you want Node-RED to launch it on startup, you will first have to add the NPM project called “midi” to the Node-RED project, which you can do with the command:
npm install midi
Then you would add our MIDI UDP forwarder into Node-RED by including a little snippet (line 6 below) in the functionGlobalContext property of the Node-RED file “settings.js”. Note: I like to keep my code out of the Node-RED folder, hence the “../protos/” relative path.
Once you have made this change to the settings file you will have to restart Node-RED.
| |
Let’s start by displaying input from our MIDI device, introduced in Part I, namely a Behringer USB/MIDI Controller 🔗 . To test this we configure a UDP input node and wire it to a Debug node.
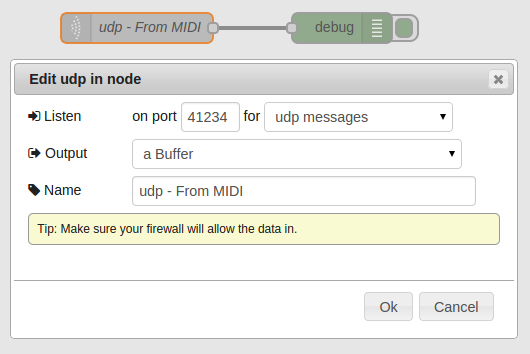
We use Node-RED’s deploy function, and move one of the faders on the device, and the debug panel of our editor responds immediately with messages like this:
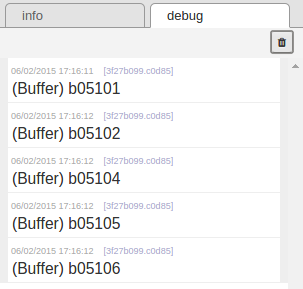
The binary format of the messages is a little obscure, but we recall the triplets we saw in our NodeJS console script at the bottom of Part I and we realize the buffer is actually composed of an array of values. With a little digging we find out that the array contains three unsigned integers (Uint8), so we write a little function to interpret them …
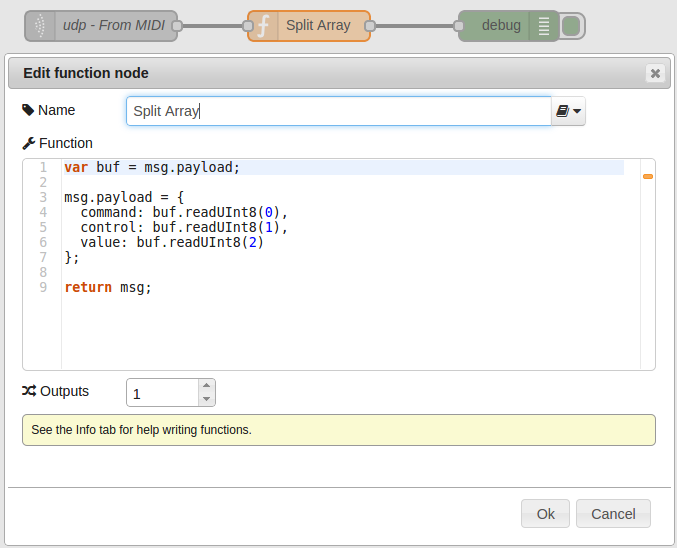
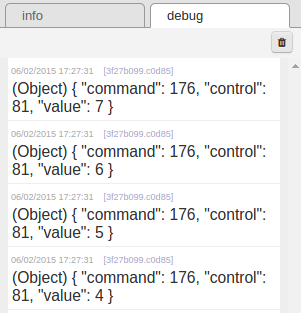
… and now when we move a slider our debug panel makes a little more sense:
Now we want to test our output feature. We’ll use an Inject node to emit a signal when we click on it with the mouse, and then connect that node to a function node that produces a random MIDI instruction like this:
function randomInt(min, max) {
  return Math.floor( Math.random() * (max - min + 1) + min );
}

msg.payload = new Buffer([
  176,                 // Our MIDI command is a constant.
  randomInt(81, 88),   // The Behringer's faders are numbered 81 to 88
  randomInt(0, 127)    // Allowed fader values run from 0 to 127
]);

return msg;
Finally we wire that up to a UDP output node configured like this:
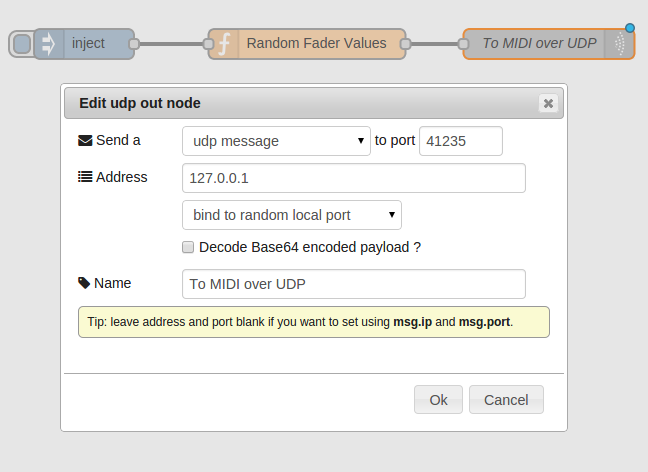
We hit Deploy and click the Inject box a few times and, sure enough, each click causes a random fader on our BCF2000 to jump to a new position. So we have confirmed that we can successfully send and receive MIDI values, and now it’s finally time to design our RESTful API.
We start by considering the typical verbs in the HTTP protocol, namely GET, PUT, POST, and DELETE. Since we are dealing with a physical device we really don’t need the DELETE verb. We’ve demonstrated we can write to our MIDI device, but should we use POST or PUT? In RESTful APIs, the verb POST is sometimes used when you don’t know the ultimate destination or URL of the resource you are modifying. This doesn’t quite match our scenario. We are modeling a physical device with several uniquely identified sliders and dials, and so we really should know which ones we are updating, and this argues for using the verb PUT instead of the verb POST when writing to our API. So now we come down to the verb GET. The first thing we notice is that the MIDI protocol doesn’t really offer any support for a request-response cycle, and so we now have to decide where GET will we read its values from.
Perhaps we should think of our motorized control panel as just another input/output device in a larger collaborative system. Conceptually speaking, the only difference to our system between a real MIDI panel and virtual one running on a touch display is the fact of its physical form. We will be needing a little more than a programmatic facade for MIDI, so for our prototype we decide to store values somewhere on the computer and then echo these values out to the controller. This makes it easy to also send them to any interactive visualization we decide to wire up over our RESTful API.
So our API will look like this:
- GET /api/midi/:control (accept numeric values for control; non-numeric values return all)
- PUT /api/midi/:control/:value (update numeric control with value)
Now we need to decide exactly where to store our data. We could create an in-memory store and initialize it on startup, but let’s assume users will want to recall previous values after server restarts. This means we will need to make our settings persistent. Node-RED comes with MongoDB database support, and we intend to use a database later for the data we want to visualize in a web application. Taking advantage of the rapid prototyping offered by the availability of a visual editor, we decide to make a MongoDB database for our MIDI values.
We already have MongoDB installed on our system, having followed the instructions here 🔗 . We add a MongoDB output node to our workflow, and configure a database definition by clicking on the pencil icon. We can leave the login credentials and name blank on our system, but if you are connecting to an external system you may need to populate these.
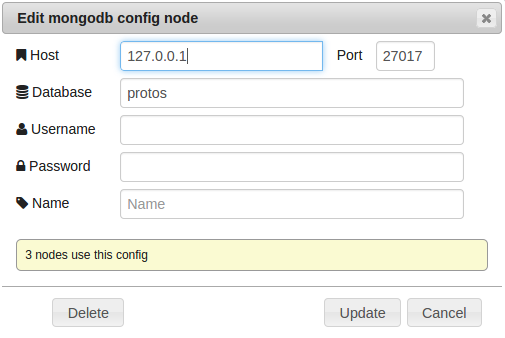
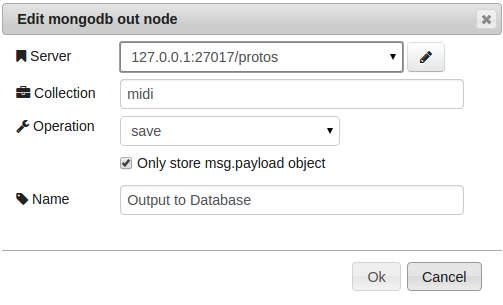
We then complete the definition of our output node like this. The server field is populated by the previous step, and then we name a collection called midi in our protos database, and elect to store only the msg.payload objects sent to this node:
We modify the “Split Array” node on our canvas, naming it “Format DB Update”, and we configure it to receive input from the MIDI UDP node as before but then change the output that can be fed into our MongoDB output node:
var buf = msg.payload;  // input from UDP MIDI is a Buffer object

// msg.payload is the record we want stored in MongoDB
msg.payload = {
  _id: 'bcf2000_' + buf.readUInt8(1),  // define the _id to for MongoDB
  source: 'device',                    // distinguish source of update for later
  value: buf.readUInt8(2),             // retrieve value from UDP message
  updated: new Date()                  // keep track of time
};

return msg;
Our updated UDP to MongoDB workflow looks like this:

Now we want to read values from the database, so we create a new set of nodes like this chain comprising an HTTP input node, a function, a MongoDB collection node, and an HTTP output node:

The HTTP input gets the API definition as shown above. The function node “Format DB Query” contains this code:
var control = +msg.req.params.control;  // attempt to read numeric control ID

if ( control ) {
  // define mongodb find query for specific midi control
  msg.payload = {"_id": "bcf2000_" + control};
} else {
  // non-numeric control is treated as a request for "all"
  msg.payload = {}; // a blank mongo find query returns all records
  msg.sort = {"updated": -1};   // sort by descending date of update
}

return msg;
The MongoDB collection node is configured like this:
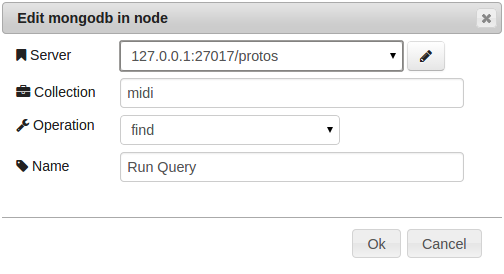
After deploying our new configuration, we try our new GET API call from the console.
jwilson@oak~$ curl -X GET localhost:1880/api/midi/1
[]
jwilson@oak~$ curl -X GET localhost:1880/api/midi/all
[]
This is to be expected, since the database is empty. We go to our controller and nudge a few faders and turn a few dials, and then we try again.
jwilson@oak~$ curl -X GET localhost:1880/api/midi/all
[
  {
    "_id": "bcf2000_2",
    "source": "device",
    "value": 11,
    "updated": "2015-02-07T16:04:01.081Z"
  },
  {
    "_id": "bcf2000_1",
    "source": "device",
    "value": 19,
    "updated": "2015-02-07T16:04:00.362Z"
  },
  {
    "_id": "bcf2000_83",
    "source": "device",
    "value": 31,
    "updated": "2015-02-07T16:03:58.807Z"
  },
  {
    "_id": "bcf2000_82",
    "source": "device",
    "value": 25,
    "updated": "2015-02-07T16:03:58.360Z"
  },
  {
    "_id": "bcf2000_81",
    "source": "device",
    "value": 29,
    "updated": "2015-02-07T16:03:57.970Z"
  }
]
jwilson@oak~$ curl -X GET localhost:1880/api/midi/1
[
  {
    "_id": "bcf2000_1",
    "source": "device",
    "value": 19,
    "updated": "2015-02-07T16:04:00.362Z"
  }
]
We now define our PUT request handler. We already have a node for outputting to the database (defined in the UDP step above), and we have a node for sending to the MIDI device (defined when we used the Inject feature to test our UPD output connection). We require three new nodes: an HTTP input node configured with our API PUT definition (PUT /api/midi/:control/:value), a function node to receive the PUT request and send responses (defined below), and an HTTP output node to indicate success or failure. The blue dots on the nodes below show these additions.

The functions defined earlier all assumed a single output. When we add our new function node, we will use a feature in Node-RED’s function definition to configure three output hook points.

This changes how we write the function. Instead of creating (or modifying) a single msg object, we define an array of three objects, named outputs in the code below. Each element of this array corresponds to one of the output connection points on the right side of the function node, counting top to bottom. In our code we use constants to help keep track of the purpose of each message element. The comments in the code help explain what’s going on. Notice that we’re only allowing localhost to perform updates using the API.
| |
We can now update from the console on the local machine:
jwilson@oak:~$ curl -X PUT localhost:1880/api/midi/82/0
{
  "status": "OK"
}
We now add the feature to restore values to the MIDI device on system startup. First we re-purpose our Inject trigger, setting the checkbox to Fire once at start. We wire its output to a MongoDB collection node that issues a find operation on the midi collection. The output from the database node feeds into a function that sends a mass update to the UPD MIDI node.

Here we have another twist on Node-RED’s function output. In the PUT api definition above we created multiple outputs, but this time we have a single output but a sequence of messages. The code for sending multiple messages to our UDP node looks like this:
var records = msg.payload;

var messages = [];

// format each message for downstream UDP
records.forEach(function (rec) {

  // control number is stored in the _id field after the underscore
  // e.g. bcf2000_81 => 81

  // the double tilde converts string to integer
  var control = ~~rec._id.split('_')[1];

  messages.push({
    payload: new Buffer([ 176, control, rec.value])
  });

});

// wrapping the message array in a surrounding array
// causes each message to be sent in sequence
return [messages];
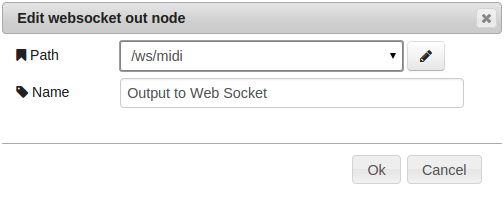
Finally, we notice that our database write operations would make a nice event stream if we also sent them over a web socket. We add a websocket node from the output tools and configure it like this:
After a little cleanup our RESTful, database-backed, motorized MIDI controller prototype is now ready for a front end. That will be our next exercise.
